
The Lenovo Tab P11 Pro Gen 2 device can only be used to its full potential after being rooted, so if you’ve been looking for the appropriate methods to do it, go no further. You’ve arrived at the right place if you currently own an Lenovo Tab P11 Pro Gen 2 Android tablet and need to safely root it without a PC, Mac, or laptop without bricking the device or without installing TWRP.
In this straightforward article, we’ll guide you throughout five distinct methods to Root Lenovo Tab P11 Pro Gen 2 Without PC or With PC, i.e. without TWRP Recovery. Five different ways have been outlined, and you now have an option. You have alternative options if one of the processes from the list below didn’t work for your device for any reason.
Table of Contents
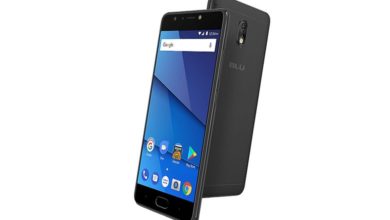
About Lenovo Tab P11 Pro Gen 2
The Lenovo Tab P11 Pro Gen 2 gets the specifications:
Model Numbers: ZAB50194GB, ZAB50043SE
Chipset: MediaTek Kompanio 1300T (6 nm)
CPU: Octa-core (4×2.6 GHz Cortex-A78 & 4×2.0 GHz Cortex-A55)


GPU: Mali-G77 MC9
OS: Android 12L
Internal: 128GB 4GB RAM, 128GB 6GB RAM, 256GB 8GB RAM
Camera: 13 MP, f/2.4, (wide), AF
Display: 11.2 inches, 357.0 cm2 (~81.2% screen-to-body ratio) / OLED, HDR10+, Dolby Vision, 120Hz, 420 nits (typ), 600 nits (peak) / 1536 x 2560 pixels, 5:3 ratio (~267 ppi density)
Battery: Li-Po 8200 mAh, non-removable, Fast charging 20W, Quick Charge 3.0
Why Root? What is the meaning of Rooting
Rooting is not an ordinary process if we have to state it all in simple terms. Rooting an Android tablet is what we’re referring to here; it’s not the same as rooting a tree. Giving the hardware of your Android tablet superuser, administrator, or superpower privileges is known as rooting the device. When shipped from the factory, Stock Android OS devices have a limited set of software (OS) permissions. Once you’ve rooted your device, you’ll have access to SuperUser privileges, allowing you to modify your Android System Settings, whatever you’d like.
Before proceeding with the procedure, you should understand the advantages and disadvantages of rooting your Lenovo Tab P11 Pro Gen 2 tablet.
Pros/ Advantages of Rooting
You can customize your device after rooting it, including installing custom ROMs, removing factory-preinstalled bloatware, and updating your tablet to a new Android version. In addition, you can install incompatible apps by tweaking the operating system settings, changing your device’s skin, boosting battery life and Android system speed, adding external storage, and doing a lot more. One of the main benefits of having a rooted Android device is the unlimited ability to take entire device backups. Popular Backup apps like ‘Titanium Backup’ requires a rooted device. It will be helpful in Backup/restore SMS,MMS,calls,bookmarks,Wi-Fi AP as XML. You can even backup, restore, and freeze your apps + data with such apps.
Cons/ Disadvantages of Rooting
Rooting your device comes with cons or disadvantages as well. Because manufacturers ship unrooted and locked devices, the major drawback is that your device’s warranty will be voided once you root it. In fact, your tablet may be bricked if something goes wrong while rooting it. Manufacturers only provide updates to the unrooted devices; hence your device will no longer remain secure because it will not receive official firmware updates from the manufacturer.
How To Root Lenovo Tab P11 Pro Gen 2 Without PC / Without TWRP
Method 1: Root Lenovo Tab P11 Pro Gen 2 With KingRoot
- Download KingRoot APK latest version and install it. If ‘Installation blocked‘ message appears on Chrome/ Android, then take it as a reminder that you have not yet unlocked ‘Installing apps from unknown sources‘ other than Google Play.
- Once the installation is complete, click the ‘Open‘ button to start the KingRoot app.
- Tap on the ‘Try it‘ button to enter into the main interface, and click the ‘Get Now‘ button to start the rooting process.
- Once the rooting process is completed, you will get a message notification that ‘Your device is Rooted Successfully.’ Simply return to the main KingRoot interface screen.
That’s all; you have successfully Rooted your Lenovo Tab P11 Pro Gen 2 without PC with KingRoot APK/ App.
Method 2: Root Lenovo Tab P11 Pro Gen 2 With KingoRoot
- Download KingoRoot APK latest version and install it.
- If Google Chrome warning or Operating system warning appears on the screen about ‘KingoRoot.apk‘ or ‘Installation Blocked‘, then simply unblock. Just got to Settings > Security > Installation Blocked (Uncheck/ turn off the button stating Installation of apps obtained from unknown sources). and click ‘Ok‘ to continue with the installation of KingoRoot.apk on your device.
- Then, install ‘KingoRoot’ on your tablet by adhering to the instructions displayed on the screen. Simply tap or click to open the ‘KingoRoot‘ app once installation is complete. Click on ‘One Click Root‘ to begin rooting your tablet, which will take a few seconds to complete and show the results on the screen.
- That’s all; you have rooted your Lenovo Tab P11 Pro Gen 2.
Method 3: Root Lenovo Tab P11 Pro Gen 2 With Magisk
- Download the Latest version of ‘Magisk. zip‘ to grant root access to your Lenovo Tab P11 Pro Gen 2 device before moving on to the next process.
- Press ‘Volume Down + Power Button‘ simultaneously (at the same time) to put your tablet into “Recovery Mode” and wait until the boot animation displays up on the screen.
- Then, simply press ‘Install,’ locate the ‘Magisk. zip‘ file, and choose downloaded file (magisk.zip), and then tap ‘Swipe to Confirm Flash.’
- The installation procedure would take a short while to complete. Simply tap ‘Reboot‘ after the flashing process is completed.
That’s it. You have successfully rooted your Lenovo Tab P11 Pro Gen 2 device with Magisk.
Method 4: Root Lenovo Tab P11 Pro Gen 2 With SuperSU
- Download ‘SuperSU.zip‘ Latest version, which is required to obtain the root access on your Lenovo Tab P11 Pro Gen 2 device.
- Simply press ‘Volume Down + Power Button‘ both at the same time to start the device in ‘Recovery Mode‘ and wait until the boot animation appears on the screen.
- Then, just Tap on ‘Install‘, then navigate to the ‘SuperSU. zip‘ file, select the file supersu.zip, and then tap ‘Swipe to Confirm Flash.’
- Then, simply hit ‘Install,‘ scroll to the ‘SuperSU. zip‘ file, select the file ‘supersu.zip,’ and then tap ‘Swipe to Confirm Flash.‘
- The installation procedure would be completed in a short while. Simply tap ‘Reboot‘ once the flashing process is finished.
- That’s all there is to it. Your Lenovo Tab P11 Pro Gen 2 has been successfully rooted using ‘SuperSU.’
How To Root Lenovo Tab P11 Pro Gen 2 With PC
- First of all, on the Lenovo Tab P11 Pro Gen 2 tablet, enable Developer Options. Go over to ‘Settings>About Tablet>Build Number’, tap it 5–7 times, then return to the preceding section, tap Developer options, and then just turn on ‘USB debugging.’
- Afterwards, use an ‘USB cable’ to connect your Lenovo Tab P11 Pro Gen 2 tablet to your computer or PC.
- Now, download the ‘KingoRoot‘ software to your PC and install it on your computer.
- After installation of the ‘KingoRoot‘ software, click on the ‘KingoRoot‘ icon on your desktop. Once the software has opened, immediately connect the tablet to the ‘PC‘. A prompt will then appear on the screen; simply tap ‘Okay‘ to accept it.
- Once the device is Recognized by the System, just tap on ‘Root‘. Afterwards, the rooting process would be completed in a matter of a few minutes.
That’s all, your Lenovo Tab P11 Pro Gen 2 has been successfully rooted.
It’s time to take advantage of all of your device’s capabilities if you were able obtain root access via one of the aforementioned five methods. Simply visit the Google Play App Store, look for the Root Checker app, and download it to see whether your tablet has been successfully rooted if you want to validate whether it has been done so or not.
The tutorial should be helpful, and you may anticipate reading more articles. Please leave a comment on the article below if you have any recommendations or comments. Don’t forget to follow us on Twitter and like our Facebook page to stay up to date with all of our Android Updates.


PGSLOT999 คือผู้ให้บริการเว็บสล็อตออนไลน์อันดับ 1 ที่ดำเนินงานภายใต้รูปแบบสล็อตเว็บตรงไม่ผ่านเอเย่นต์ ซึ่งมุ่งมั่นในการส่งมอบความมั่นคงและความปลอดภัยสูงสุดให้แก่ผู้ใช้บริการ ผ่านการบูรณาการและรวบรวมเกมเดิมพันลิขสิทธิ์แท้จากค่ายพัฒนาซอฟต์แวร์ชั้นนำระดับสากลมาไว้ในแพลตฟอร์มเดียวอย่างครบวงจร อาทิ PG